Friday, April 30, 2010

Another look at the Summer Sizzle kit!

Can you believe it is nearly May already! Where does the time go! As we approach the summer and all those summer birthdays I thought now would be a good time to give you another look at the Summer Sizzle kit. The kit is packed with some vibrant citrus papers ... a bit of grunge and even a set of stamps that will just keep on giving ... and all for the fabulous price of just $15.00. So what are you waiting for .... go buys yours before they all go!
That is it from me for this week ... I hope you have all had a good week  and have a wonderful weekend everyone! Until next time!

Wednesday, April 28, 2010

This place is going to the birds...

well the bird cages that is...it's Lynda again...and I'm back with these fabulous bird cage stamps to give you another idea of what you can do when you get yours...just look at this set...

to create this card I watched one of the wonderful Youtube videos that Stampendous has available...the one I watched showed you how to create a background similar to mine using Versamark ink and the Stampendous Merlot embossing powder kit....so here is my card. I decided to stamp my images onto a transparency and add them to the top of my embossed card...
I hope you'll consider picking up this stamp set for yourself...you can find it in the Creativity Boutique right here.
Happy crafting....Lynda

Tuesday, April 27, 2010

I showed you the sneak peek...

Now here's two of the pages that I have created with the May kit!And just for fun, here are a few more peeks at what else I have to show you soon with this amazing kit! Big kudos to Pam for designing this one!

Monday, April 26, 2010

Even Changito Needs His Coffee!

My boys were asking me the other day if I would take out some of my monkey stamps and make some cards with them (yes, the boys and the stamps). We hung out and Changito got inky. Changito with his 2 cups of coffee reminds us of my husband Gary, who just loves his coffee too. My card this week is inspired by Gary:


The image on this card is called a folded frame. You can use it to frame images for your scrapbooking as well as cardmaking. It is quite versatile! Here is my tutorial on how to make this fun frame.

Begin with a 4 1/4" square of double sided paper ( I used some Kaiser Craft MAYBE from the IMAGINE line). Using your scor-pal (or papercutter with a scoring blade) line opposite corners with the 3" line on your scor-pal. Score at 1"and 1 1/2"


Turn your paper 90 degrees and line the corners up again at the 3" line, score again at 1" and 1 1/2". Repeat until all 4 sides have been scored. Fold the corners in to the center of the square, folding on the innermost score line.


Fold the corners out on the 2nd score line and do this for each corner.


The inside area of the frame measures 3"x 3". Your image for inside the frame should fit on a mat measuring 2 7/8" square. I chose to ink my image on a sheet of pale blue cardstock that complements the patterned paper. I thought it would look nice to paper-piece the image using papers from the same KAISER CRAFT paper line.


I finished the image by coloring it in with watercolor crayons before placing it inside the frame.


Once the image is adhered to the inside of the frame, reposition the folds and use pop dots to keep them in place. Popping them up with pop-dots will give it a 3D look.

Once it is complete, you are now ready to use it to embellish a card or layout! VOILA~~~~


Sunday, April 25, 2010

Happy Sunday


Mother's day is just around the corner so I am starting to think Mother's day cards. I made this one using the beautiful May Kit! SO many possibilities with this kit! Hope you have a great day and start thinking about Mother's day *wink*

Saturday, April 24, 2010

Did you SEE the MAY kit?


I had the pleasure of designing the May Kit 'n Kaboodles kit with Gerri-Anne. I had a BLAST! I got to mix my two favorite companies together. The kit is primarily Pink Paislee and Jenni Bowlin Studios with some Prima, Bazzill, and Smooch thrown in!

Above are two of the layouts that I made with this kit...one girly, and one masculine. This kit is sooo versatile! I can't wait to show you the other layouts that I have completed...both with adults, and one is actually a 2 page layout! Keep on the lookout for those, and enjoy your May kit!

Friday, April 23, 2010

Decoupaging your stamped images!


For this card I have used the Stampendous Sunflower Scene stamp. Mine is wood mounted but it is also available on cling here
I stamped the image three times in black archival ink on white card. You get three goes at this ... and because you don't need a perfect image every time ... it is a great technique if you are new to stamping.


Color your images in using whichever pens you have. I have used Pro markers ... but Copics; Marvy le plumes; water colors... the kids crayons anything will do. Once they are colored cut out as illustrated above.
Take a long slim card and about a third of the way up make a slot in the spine with your craft knife ... just wide enough to slide a piece of ribbon through.Place your ribbon through and tie in a bow ... cutting the ends into a point.
Stick the first layer flat and build up your flowers a section at a time. Use either a 3 dimensional glue or foam pads to make the layers stand out. I always curl the upper two layers around a bone folder so you cannot see the adhesive.
There you have it ... a quick and simple card ... just add a greeting when you next need a card.
Don't forget to check out the Summer Sizzle card kit ... there are still some available.
Have a good weekend ... see you next week!

Thursday, April 22, 2010

Magnificent May!!

The KnK May kit is nothing short of spectacular! There's nothing better than getting a new kit and getting one idea after another just by laying it out, feeling the paper, and rearranging the product in different ways on the table. These two layouts are my first reveal, and I have plans for several others which I can hardly wait to get started on.
I kept my double quite simple, as I often do, but the doodling and dotting with my Black Diamond Stickles really add some sparkle to the page, and the colors in the papers are just brilliant! Journaling reads:
"The Sun shining behind the rain was just too irresistable! You grabbed some shoes (Katy's), put them on as fast as you could (backwards), and ran outside to Swing in the Rain. It's times like this one that your Cute little personality shines through, and I so Love these moments with You."
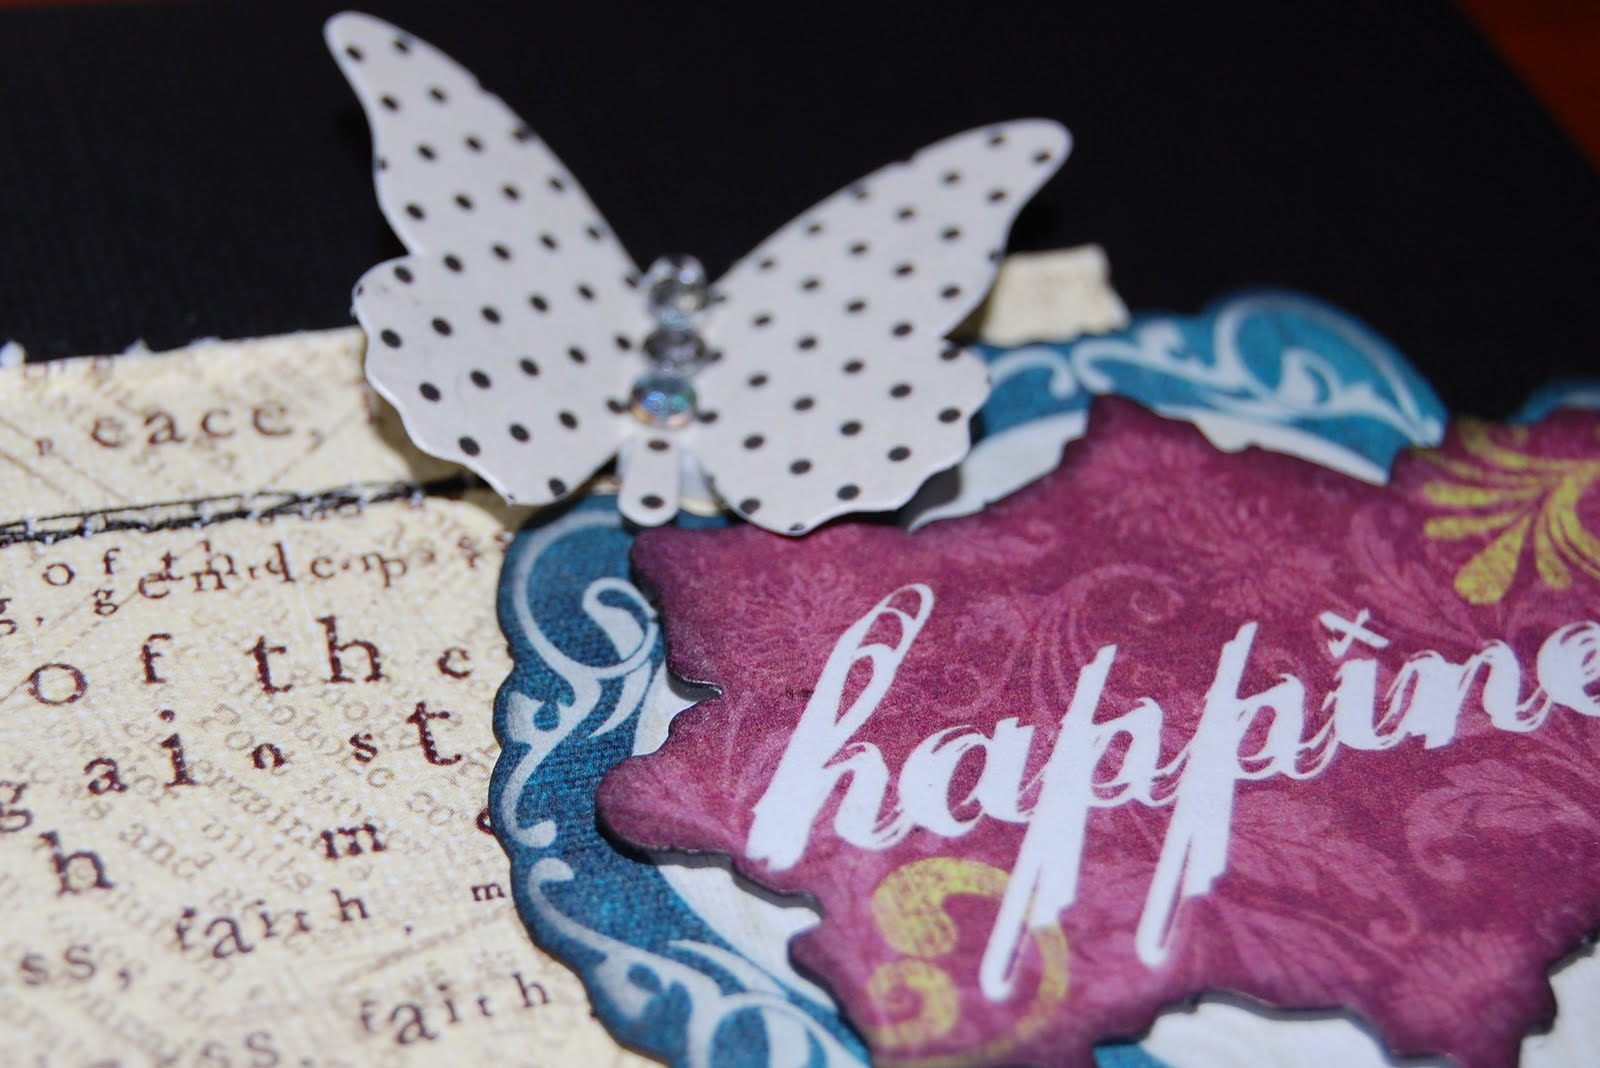
When I saw the Jenni Bowlin butterflies in the kit, this Robert Heinlein quote instantly came to mind, quickly followed by a memory of taking these pictures of my eldest daughter rearranging the dirt in my garden. Or rather, removing the dirt from my garden. I love the touch of pink in the Prima papers. So soft and sweet.... just like my Katy in these pics. If you haven't had a chance to check out the whole kit, go have a look HERE. You won't be disappointed!
And don't forget, we have a sketch challenge with a RAK up for grabs posted HERE! It's not to late to join in, you still have about a week to play!

Wednesday, April 21, 2010

Hello little birdie....

I have say that I adore this sentiment that is in this stamp set by Stampendous...I mean look how cute these stamps are:

don't you just love that "Hello little birdie..." sentiment...I mean...look how cute it is on this card...


I stamped a few of the birdcages on the kraft cardstock in a random pattern; added a piece of scrap ribbon that I had in my stash (Basic Grey) and then stamped the little bird and sentiment on a strip of brown cardstock; edged the bottom with my mini-scallop scissors and then inked the entire card around the edge...done!!

I hope you too will catch on to this birdcage trend and pick up your Stampendous stamp set in the Creativity Boutique store right here.

Happy crafting.....Lynda

Tuesday, April 20, 2010

Just FRAME IT with our May KNK kit!


I had the best time this month playing with the May kit, making these two frames. The bigger one is 12x12 and I'm going to use it for a picture for an upcoming cruise I'm taking this next week.
The smaller one is 6x6 and shows two of my favorite people! You have to order the add on's for this kit as they are FABULOUS and so much fun to work with!! And there is a ton of them! Go to our KNK site and order it now- you won't be sorry.

Monday, April 19, 2010

Creating at a Crop

On Saturday, I was lucky enough to be able to hang out with some crafting friends. It was lots of fun! I had recently gotten this new sunflower/farm stamp and was looking forward to inking it up! Fran (from Stampendous) has awesome videos on youtube where she shows how to "Paint with Powders". I used her technique to paint the image. Remember last weekend when I went to the class with Nikki Sivils? Well, the sunflowers in this stamp reminded me of her "Willow Bee" collection. Hmmm....now the creative juices began to flow, and here is my result!

Sunday, April 18, 2010

Thinking of you


I got some new yummy stamps from Creativity Boutique. I really wanted to create a simple tone on tone colored card. So I double inked the image on the stamp. Not sure if "double inking" is an official term or not. But I added 2 slightly different colors, both turquiosey colors in this case, to the stamp and then stamped. It didnt photograph as well as I hoped but the lighter areas are the lighter ink. Looking back I think the card could use a little bling. But I had to get the card out the door within the hour since I needed an Anniversary Card ASAP. Hope you have a great day.

Saturday, April 17, 2010

Fun with Smooch Spritz

Check out this little cutie that came in my May kit box from KnK!This was my first experience with Smooch Spritz, so I was interested to see just how it compared to Glimmer Mist. As I sprayed a little bit on a scrap piece of paper, my first observation was how vibrant the color was! And it is a little thicker, and not watered down. A little bit of this stuff goes a long way, so don't let the size of the bottle fool you!

I then decided that I wanted to do something a bit different with this stuff rather than just misting my background paper like I often do with Glimmer Mist. I wanted to put this stuff to the test. I pulled out my acrylic stamps, sprayed a little pool of Smooch Spritz on a piece of plastic, and used it like ink to stamp some flourishes on my page!Then I decided I wanted to do some stitching on my page, but I didn't have the right shade of DMC floss. Problem solved with Smooch Spritz! I cut a piece of white floss to the length I needed, wadded it up a bit, laid it on plastic, and sprayed it with the spritz, dying it the perfect color for my page! After letting it dry overnight, I was ready to start sewing!So, I guess I'll add Smooch Spritz to my list of must haves in all colors! I hope you like my sneak peeks and my little scrappy experiments! Check back soon to see the rest of my page!

Friday, April 16, 2010

One stamp ... three backgrounds!

I Have been playing with this fab Stampendous Stamp today and thought I would share some background ideas with you. The best thing about creating your own backgrounds is that you don't have to sort through lots of decorative paper finding just the right color ... you simply grab a piece of white card and make your own.
 For the first background I used Aged Mahogany, Spiced Marmalade and Mustard seed Distress Inks. I blended them gradually making them lighter towards the centre.

Next I covered the stamp with Gold Acrylic Dabber and stamped it firmly onto the card.
The picture does not do the final piece justice ... the effect really is quite rich and very pretty.
The second background was created using Bundled Sage and Forest Moss.
 I stamped the background in Olive archival. This gives a lovely William Morris look.
For the final background I used Stormy Sky and Pumice Stone Distress ink blended onto the card.
I then stamped in Jet Black Archival ink.
There are so many variations you could do with just this one stamp ... and so many different cards you could create.
All that is left is for me to wish you all a fab weekend ... so have a fab weekend won't you :0)

Wednesday, April 14, 2010

Early April flowers...

Stampendous makes some amazing stamp sets...they combine a sentiment with another stamp and wow... just like this set that I was fortunate to get to play with this month...it's called Blessed Spring.

For my card I stamped the images onto white cardstock and first used the sponge to add pink ink all over the images... I then used Prismacolor pencils to color in the flowers... I pulled out my decorative edge scissors on the right side of my white cardstock... I added the entire stamped piece to my kraft cardstock cardbase...then added this fun strip of paper trim that I had in my stash along the left edge...

I hope you'll take a peek in the Creativity Boutique store for more of these great Stampendous stamp sets!!

Happy crafting....Lynda

Tuesday, April 13, 2010

It's been a while!

Actually, quite a while, since we've had a sketch challenge! Now this sketch is quite basic, but that's the beauty of sketches, right? Take something simple and make it your own! I'd love to see what some of you ladies will come up with. If you complete the challenge and post a link to your layout in a comment to this post by the end of the month, I'll randomly draw for a RAK. If you use a KNK KIT to create your layout, you'll get an extra entry. How's that for easy? Happy scrappin' :)

Monday, April 12, 2010

A day in the park...with Nikki


GerriAnne and Sonia hosted a class this past weekend with designer Nikki Sivils. She brought some products from her "Willow Bee" line and we made an album together. The gals from KNK first heard about Nikki at CHA summer 09. She is a new designer, with some adorable products. This is the 2nd time that she has come and done a class with the KNK girls who could come to Fort Myers, FL. It was the first time (aside from meeting her in the booth at CHA) that I got to meet her, and have a class with her. It was amazing!!
When I saw the products we were going use for our mini-album, I had the perfect photos! My class took a trip to a local park after a field-trip, and VOILA~~here is my album (it needs a little more work, but you get the idea).


If ever get a chance to take a class with Nikki, I would strongly suggest you do. She is a great teacher and fun to be around. Check out the Creativity Boutique for some of Nikki's current products!