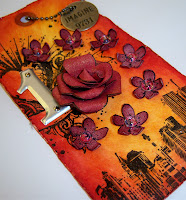
Showing posts with label tim holtz. Show all posts

Friday, July 9, 2010

Remember!

For those regular viewers among you ... this card will look familiar. I blogged the same design a while back and thought I would take this opportunity to show you the different look you can get just by using different Distress Ink colours. This time I have used Broken China, Dusty Concord and Antique Linen. The Agapanthus stamp is from Stampendous.
And if you are a regular visitor please show the team here some love ... leave a comment ... the girlies here have blogged some real beauties this week ... and you know the saying ... a little goes a long way :0)
Have a great weekend everyone!

Friday, July 2, 2010

Pack Your Bags!

I told you I got some yummy stuff in the post on my return from Ranger U now did n't I??? One of the things was a fab travel stamp collection by Stampendous. Another thing was one of the delightful little suitcases from Zutter. Now I am not much of a scrapper ... but I do like collecting tickets from my travels and making mini books ... so I took a piece of white card ... scored it ... cut the corners off to form a concertina tag album and started Distress inking and stamping without delay. I added a few Idea-ology adage tickets and some left over coins and Ta Da ... a quick and simple keepsake!
And if you have n't been on your travels recently ... well how about recording some of your wishes or giving a book of wishes away as a gift for that friend that has everything!

Have a wonderful weekend everyone ... see you next week!

Friday, June 25, 2010

The Final Countdown!


As promised here are the final four countdown tags I made in the run up to Ranger U! I can't believe I have been and come back already! I had an awesome time! I used all 36 Distress Ink colours on the ten tags.

I will be back next week with something different ... while I was away a new box of toys arrived for me to play with :0)

Have a fab weekend everyone!


Friday, June 18, 2010

Playing Tag - By Proxy!


As many of you know I am actually away at Ranger U at the moment! During the build up to this trip I made a tag for each day! I shared tag numbers 10; 9 and 8 with you last week ... this week here are 7; 6 and 5! I will show you the final four on my return next week!

I hope you enjoy looking at them! I have used all 36 Distress ink colours across the ten tags.
See you all next week with the final four tags ... Have a fab weekend!


Friday, June 11, 2010

Tag ... You're it!


A slightly different type of post this week from me! I have been busy counting sleeps  until I go to Ranger U in SEVEN more sleeps and each day from 10 more sleeps I have been making a tag to mark the passing of another day! So I thought I would share all 10 with you over the next three Fridays. The tags are all manilla shipping tags ... the ones that Lord Tim of Holtz himself uses and they are all coloured using Ranger Distress Inks ... in case you have n't noticed these just happen to be my all time favourite inks ever ever ever!
If you feel like making a tag yourself ... well all of us girlies at Kreative Kaboodles would just love to see it ... so link us up and we will come visit you!
Have a wonderful weekend every body ... until next time! I say next time ... I won't actually be here ... I will be in New Jersey ... but hopefully my tags will still appear in my absence!

Friday, May 28, 2010

Two of my favourite things!

I thought it would be nice to share a few of my favourite things with you guys this week. You have probably guessed by now that one of them is the range of Distress inks from Ranger. I LOVE them and if I could start my crafting life over ... well they would be the first pads I bought ...and trust me ... I bought plenty that I never use! Why are they my favourite??? Well you can create beautiful backgrounds with a few inks and some white card ... oh yeah and a fabulous stamp. To make the above background I coloured the white card with Fired Brick and Spiced Marmalade distress ink then I stamped over the top in Fired Brick with the Stampendous Agapanthus stamp.
My second favourite thing is Stampendous embossing powder ... especially the Gold Detail. If you grab some card and pat it with the Gold Acrylic Dabber and then shake Gold embossing powder over the top ... once heated you are left with a really lovely textured vintage look ... trust me! No one will believe it started life as a piece of white card.
So ... don't leave me in suspense ... What are your favourite things?

Monday, May 17, 2010

Moo~Chas Gracias!

Today I thought that I would post a fun technique for you to make your own unique background papers. All you need is glossy cardstock, ink and daubers, and rubber cement (yes, you read that correctly...rubber cement). This works great for any type of papercrafting (scrapbooking, cardmaking, altered arts etc). Pick the color scheme or patterned paper for your project. I am loving the new colors of Tim Holtz distress inks, and choose Wild Honey for this project ( it coordinates with Nikki Sivils Willow-Bee line perfectly too).

Step #1--drizzle some rubber cement in a random pattern on top of your glossy cardstock. I am using a 4x6 sheet of photo paper here.


Let the rubber cement dry before proceeding to the next step (tick~tock)

Step #2--use your felt pad or dauber to apply ink to the entire sheet of glossy cardstock...go right over the rubber cement!


This is how it looks now :)

Step #3--use an adhesive remover to pull up the rubber cement. You can try using your fingers to rub it off, but if you rub too much you will get a blister (ask me how I know this, I dare ya!)

GUESS WHAT~~??? Your sheet of cardstock is now ready to be used!!!! You can use this for a photo mat on a layout, or a mat for an image for a card.

Here is a card that I made using an adorable stamp from Penny Black called CHEERS! (isn't she just moooo--velous?), patterned paper from Nikki Sivils Willow Bee collection, and a muddy brown cardstock. I was trying to be witty so I wrote my own sentiment.
My middle son graduated from High School on Friday, and he will be using cards like this a thank you notes!!!

Friday, May 7, 2010

Difficult Cards

We all have to make difficult cards from time to time ... nothing says they have to be dull and dreary ... sometimes you just want to sit and create something that will give comfort to another person. A card that will catch their eye on the windowsill when they are feeling sad ... a simple reminder that you care and they are not alone.
I have made this card with plain white card stock, I then blended Scattered Straw, Spiced Marmalade and Fired Brick to colour. I used the Stampendous Agapanthus set stamped in Coffee Archival ink and then stamped the sentiment in Jet Black Archival to make it pop slightly. I matted the card onto simple Brown card stock and added a Jenni Bowlin butterfly. The butterfly was tinted slightly using Spiced Marmalade Distress ink.
That's it from me for another week ... see you same time ... same place ... well hopefully a little earlier ... next week! Have a great weekend.

Friday, April 9, 2010

More Summer Sizzle!


I can't believe it is Friday again already ... Where did the week go? I hope you all had a fab Easter ... Here in the UK we get Good Friday off and another holiday on the Monday after Easter Sunday ... so two four day weeks and a long weekend ... it is just lovely!
I thought I would share another sample card from the Summer Sizzle kit that I have designed ... lots of Mark Richard's bling on this one and a small amount of Grungepaper for added texture and interest.
The kit is still available here and if you just want the stamp ... or the bling then you can find them here and here ... of course you may just want some yummy Spiced Marmalade Distress ink and you can find that here too.
Okey Dokey ... I am off to create something with the fab new kit I got this week ... so don't forget to come by next week and see what I created! In the meantime .... have a fabulous weekend!

Friday, March 26, 2010

Playing Tag!

I hope you are all enjoying your Fridays. I am demoing at a large UK show for the first time in a couple of weeks so I am playing with tags at every available opportunity at the moment ... just to keep my hand in so to speak :0)
This is one of my favourite tags from yesterdays samples ... so much so ... I thought I would share the details with you.
1. I coloured the tag with Mustard Seed, then spritzed Wild Honey, Mustard Seed and Rusty Hinge distress ink with a mini mister on my craft mat and dabbed the tag in the colour ... drying between dabs with a heat gun until I was happy with the overall effect.
2. Then I placed one of Tim's stencils over one side of the tag and applied Brushed Corduroy distress ink. The easiest way to do this is to gently swirl the ink over the top of the stencil with a blending tool ... that way your mask should remain were you want it to.
3. I removed the mask and then stamped the flourish with crimson red acrylic paint and once again I dried it with a heat gun.
4. I stamped the text on some scrap card. Added a few Prima flowers that were also coloured using the same inks and coated with some Rock Candy stickles for added sparkle. Finally I added an Ideology charm and the tag was complete.
I hope you have a good weekend ... whatever you are doing ... see you next week!

Friday, March 5, 2010

Crafty Eye Candy!

 
I am busy busy busy today getting ready for the online crop tomorrow! Us Creativity Boutique teamies have a little surprise up our sleeves. So I wracked my brain and tried really hard to think of something pretty you could all look at! 
After 2 seconds I settled on Lord Tim of Holtz :0)
Check out the Timmy stuff they sell right here ... so cool!
OK ... back to work for me ... don't forget to join us tomorrow :0)


Friday, February 19, 2010

Play Time!


Hello everyone.
Does this look a bit odd to you? Bare with me and all will be revealed.
Firstly I got a really really big manila tag and I blended Antique Linen; Fired Brick and Spiced Marmalade Distress Inks onto it.
Then I spritzed it with water ... stamped it with water ... then stamped it with a Coffee coloured ink. The stamp I used was the Stampendous Agapanthus.


I know ... I know ... it still looks odd ... but stay with me. I used a one inch square punch to punch random one inch squares from my tag. I say random ... I made sure some had a stamped image and some did n't. Then I mounted all nine on a 6"X6" card blank.


Hopefully you don't think it looks odd now. This took about 10 minutes in total and it makes a great note card ... alternatively ... add a greeting or a 3d butterfly and you have a lovely greetings card too.
Have a great weekend everyone ... I am off to see Sir Tim of Holtz so I just know mine is gonna be great :0)

Friday, February 5, 2010

Fashionably Late and a Game!

 
Actually I am very late but I am not entirely sure I am fashionable anymore! 
Well ... it is Friday and that can only mean one thing and that is ... it's me again ... Linda here :0)
There is no tutorial to go with my tag this week because I thought we could play a little game! First I will quickly tell you that I cut the tag out of good quality white cardstock and then I blended dusty concord, broken china and antique linen to create the background. After adding lots of splashes of water ... drying them off with a paper towel and then stamping the agapanthus stamp over the background in the same ink pads ... the rest is quite easy to work out ... but as always if you have any questions please shout.


Now for the game! It is a guessing game. The design team at Kaboodle towers have decided to share lots of different techniques using tools that most of us have but we under use. I want you to guess what tool I used this week on my tag ... here is a clue ... 
I have not used it for it's most popular use and there are bound to be lots of answers :0) ... so you can guess as many times as you like :0)
I will send this tag out to the person that guesses correctly with a little surprise attached ... if there is more than one correct guess ... well I will draw a name from a hat!
Have fun and I shall be back next week with the answer ... the winner ... and a few more unusual uses for this particular tool.
Until then ... Take care X

Friday, January 29, 2010

Let's play tag!

 
Hello everyone :0) It's only me :0)
Today I thought we could play tag ... I think tags are highly under rated ... don't just think tag ... you can add this to a card ... hang it off a gift ... add it to a scrapbook page ... the list is endless ... so without further ado this is what I used ... and how I made it!
Stash requirements:-
White card for base tag and heart ... I used 300gsm but any thick white card will do.
Grunge paper for the rose and leaf
Jet black archival ink
water and mini mister
Idea-ology embellishments


1. Blend Spiced marmalade and aged mahogany on your tag with cut n dry foam then spritz your heart stamp with water and stamp a random pattern on your tag. This picture really does not do this technique justice ... you really need to try it at home. Dry tag with heat gun.


2. Stamp the valentines text in jet black archival ink in the bottom right corner


3. Stamp the heart onto white card with archival ink and blend with Aged mahogany distress ink. Spray the mini mister into your hand a drop water onto the heart. Dry with a paper towel and cut out. Make a rose out of grunge paper ... there are loads of tutorials available for this ... but I use the one on Mr Tim's blog!
4. Assemble your tag and add a leaf to finish.
I told you it was easy :0)
See you all next week :0) Have a great weekend ... and don't forget to check back daily for some yummy posts from the rest of the Kreative Kaboodles and Creativity Boutique design teams!

Friday, January 22, 2010

Saying I Love You with ... Grey Chip :0)


Hello again everyone ... Linda here :0)
This week I thought we could make a romantic hanger for all our Valentines! I know quite often the reply would be Why??? But the simple truth is ... it's just great fun to make :0)
So without further ado ... here is the stash you need
3 grey chip coasters ... they can be beer coasters ... just cover them with grey card.
Fired Brick Distress ink
Fired Brick Distress Crackle paint
Black Coredinations core color
Black Soot distress ink
Grunge paper
Stampendous ornate heart stamp
Waxed cotton thread
Red seed beads
Alphabet letters - I and U
Butterfly stamp
Background stamp

1. Blend Fired brick distress ink on you chip
2. Stamp your background stamp in Black soot distress ink (I used a Wendy Vecchi stamp)
3. Cut a piece of cordindations card (7X7cm)
4. Distress your card with a sanding block and round the corners
5. Stick the card in the center of your mat.
6. Paint the letter I with distress crackle and when dry add some beads to embellish
7. Stamp and cut out a butterfly with grunge paper and colour with Fired brick distress ink
8. stick together as illustrated and add beads for body.


9. For mat number 3 repeat the above steps using the letter U


10. Follow steps 1 to five for mat number 2
11. Stamp the Stampendous heart onto grunge paper using black soot distress ink and cut out.
12. Attach this to the card and add an Idea0ology key ring as an embellishment
13. Stamp and add grunge butterfly.
14. Finally turn all three mats into a hanger by threading waxed cotton with beads to embellish.

Told you it was fun :0) If you would rather make a card ... just ignore the chip part and put the three coredinations squares onto a card blank.
See you next week!

Friday, January 15, 2010

Fun Background Friday!

I know that is a weak attempt at a post header ... I promise the post will be better and certainly more fun! You guys must be getting to know me by now ... which means that you know that I adore Tim ... and anything Tim. Am I excited about the new Tim releases for CHA? ... you bet!
Anyway ... just to prove we all need new stash ... we kinda have to prove ... to ourselves at least ... that we use all our old stash ... or is that just me????
So today I am going to share with you a technique that can be used with any ... yes any ... of the 24 fab Timmy distress inks ... which means we can all go buy the 12 new colors as soon as they are released ... a cool plan huh???
Grab yourself some tools and lets have some fun!


1. Ink up your Stampendous stamp with snow cap dabber and stamp a random pattern onto white card. You will need to reload with paint in between each stamp and you will need good light to ensure you don't over lap your images.
2. Dry the paint with your heat tool and make sure you clean your stamp immediately ... you really don't want that paint to dry on your favorite stamp ... believe me!!!
3. Apply your chosen color of distress ink with some cut and dry foam ... all over the card and the stamped pattern ... this will all make sense in a minute.
4. Once you have covered your card ... grab a baby wipe and wipe over the entire card ... this will make the snow cap dabber pop and ... hey presto ... you have a fab and subtle background that will match up with whatever you want! I have used old paper and dusty concord to make these samples.


5. If you want a more vivid background ... try over stamping the image with the original distress color you used ... wipe again with a baby wipe and you get this effect.


This technique really is loads of fun ... and you will always have a matching background whenever you need one ... see you next week guys ... Have a good one!

Friday, January 8, 2010

Let the romance begin!


Oh yes ... it is that time of year ... when we crafters start thinking about romance and roses and Valentine's day!  Now if you are not a Valentine's day crafter ... well that is n't a problem either ... just change the text on this card for an Anniversary message or a Happy Birthday for a loved one.
To make this card you need:-
A sheet of heavy weight white card stock
Some black card stock for layering.
Grunge paper
A small manila parcel tag
6 petaled flower ... I used a die
Tim Holtz's slight alterations stamp set
Ribbon and charm from stash!
 
1. Using a blending tool I coloured a piece of 14cmX14cm white card with Fired Brick distress ink. I then stamped around the edges with Tim's alterations stamp. I repeated this step with another piece of white card 9cmX9cm.


2. I spritzed water onto my hand using a Ranger mini mister and dropped splashes on both pieces of card stock which I immediately dried using a paper towel. Both backgrounds were then matted onto black card.


3. I stamped the beautiful music of love stamp using Black soot distress ink onto white card and embossed using clear detail embossing powder ... you can skip the embossing bit ... but I like the added texture. I then used a blending tool to colour one heart with Aged mahoghany distress ink and the other with Black soot.
4. I made the grunge paper rose using Mr Holtz's tutorial and coloured it using Aged Mahoghany distress ink and a spritz of glimmer mists.


5. Finally I put the card together ... adding dimension by curling the hearts with a bone folder ... I then added the stamped manila text tag ... some ribbon and a metal charm to complete the look.
I hope you like the finished card ... if you get chance to make one ... please come back and share the link so we can have a look ... we are a nosy bunch here :0)
See you next week everyone!

Friday, October 30, 2009

Be Gentle With Me ...

It's my first blog post ... on this blog anyway ... and ... this is my first ever Thanksgiving card! Erm ... yes I do have friends ... but I am a Brit and Thanksgiving does not appear on our calendar. Luckily the rest of the Design Team gave me kaboodles of facts and hopefully my design will inspire you to run off and make some cards.
I was sooooo excited when my Stampendous Damask Fall stamps landed on the door mat. Just the mention of the word Damask makes me think about all those lovely rich fabrics with their luxurious patterns and warm colors. So I set to work to recreate that feel on my card.


I have used a resist embossing technique to create the pattern on the background card with a mix of Spiced Marmalade and Dusty Concord distress inks. All the edges were distressed to add a bit of depth and then  layered up using yummy Chocolate Mocha Coredinations ... which is great for distressing too! Finally I thought the Damask flourishes worked well with the Wendy Vecchi flower which has been turned upside down to look like a pumpkin!

Resist Embossing
1. Stamp your pattern with Versamark ink onto white card and cover with Stampendous clear detail embossing powder. Heat with heat gun.
2. Blend your distress inks over the entire pattern and card.
3. Place a piece of plain white copy paper over your design and iron with a dry iron on a medium heat. Once the embossed pattern shows through onto the copy paper ... you have ironed the piece sufficiently.
4. Blend in a further color over the entire design ... for the thanksgiving card I used more Spiced marmalade but Old Paper works very well on most colors.
I hope you enjoyed my first post as much as I did creating it for you ... any questions ... just pop them in the comments and remember ...

Have fun :0)