Monday, September 27, 2010
Noteworthy Note-holder
Cut 2 pieces of patterned paper into 4x4 squares and cover your coaster with them. Trim and distress the edges, use distress ink to make it look nice if you desire :)
Use scalloped punches, nestabilities, or SLICE to cut nested circles to decorate front of post-it in colors complementing the patterned paper on the coaster. Also decorate a library clip with a scrap of patterned paper.
You can also use a piece of ribbon wrapped around the coaster to attach a pen or pencil. I glued down the post-it note pad for extra security, so it would not fall off.
Here is one of my finished note holders, front and back.
This post-it holder is made with the Graphic 45 paper line called Steampunk Debutante. On the back, I used one of Tim Holtz's fragments to create a point of interest for the old man to look at. This paper line from Graphic 45 is a little weird, but you can have lots of fun being creative with it! Hope you have fun too :)
Sunday, September 26, 2010
Happy Sweet 16 to my Daughter
I was looking for a fun simple spunky card for her so I used some chipboard numbers as a mask and used my glimmer mist to create the background. I then used the glimmer mist on my ribbon (it was originally white and black) and on the flower. I used the overspray to ink the edges of my tags:D Hope you have a great day!
Tuesday, September 21, 2010
Winner Winner Chicken Dinner!
Monday, September 20, 2010
New Graphic 45 is "Steamy"
Sunday, September 19, 2010
Still creating with the September KIT!
wow I can't believe the fun I have been having with the September kit! and I still have paper to spare!!! I made this all purpose card. The Kraft paper collection is so versatile! And you can add any color with it and it seems to create this instant "pop" . Here i paired it with some white core purple card stock. I did add some marshmallow glimmer mist to the flower for some sparkle. Have you tried these flowers yet? you really need to!! I am addicted!!
Wednesday, September 15, 2010
Sew what...
I first stamped the fluffles image onto white cardstock and colored it in with Prismacolor pencils. I then stitched this cardstock to the kraft cardstock. I then decided to stitch around my card base to secure that green paper strip down. I mounted my stamped image and kraft onto the orange pattern paper and then the entire thing to my card front.
Sew....how crafty are you going to get this week???
Happy crafting....Lynda
Tuesday, September 14, 2010
Sketch Challenge!!
Sunday, September 12, 2010
Fall Welcome Sign
I made this Fall Welcome sign (well i suppose it would work for any season but the flowers seemed fallish to me.) using the September Kit from KnK! There are only a few more days to get yours, so if you haven't got it yet what are you waiting for?
I made the rust and orange flowers using the technique I found here. For the rust flower I used a solid core card stock while for the orange one I used a white cored card stock. As you can see below it provides a slightly different look. I also used two different types of flowers from the GEORGE cartridge for my Cricut. These flowers are very addicting so I would expect to see a few more from me. :D oh and the yellow flower was made by layering some Prima flowers I had leftover from the June Kit. Please share you flowers with us :D
Friday, September 10, 2010
Fall Photo Challenge
Thursday, September 9, 2010
Vacation layouts!
Wednesday, September 8, 2010
Rooty tooty with Stampendous
Each week the Stampendous blog features a challenge on their blog...and I enter quite frequently... well this week my card that I entered WON! I showed you this card on my April 28 blog post if you wanted to find out the details on the card itself.
So...here is my card that I entered into their challenge to use their embossing powders on a card...for this card I used their melot embossing powder kit to create the colorblocked background.
be sure to check out their blog and their website for some fantastic Stampendous creations!!!
Happy crafting....Lynda
Tuesday, September 7, 2010
Altered Canvas Bag
I spritzed it with some Starfish and Candlelight glimmer mists. Once that was dry, I used a Pink Paislee press on. I was a bit hesitant to try to use a rub on on the canvas, but the package said that these transfer on almost any surface, and they were right! It went on like butter! I stamped the quote with Versamark ink. I used a clear glue to attach the lace on the top part of the bag and the ribbon on the handle. I made the paper rose with the Crafty Chronicle in the kit and used Starfish glimmer mist on it. Then I popped on some bling and a Jenni Bowlin butterfly, and it was done!
Be sure and share with us the creative ways you alter your canvas bag! Have fun with it and happy scrapping!
Monday, September 6, 2010
I've Been Working on My New Scrap Room
My desk area
one wall of supplies
BigShot station: inside the cupboard are all my sizzix dies, nestabilities, and supplies for my bigshot and cuttlebug :)
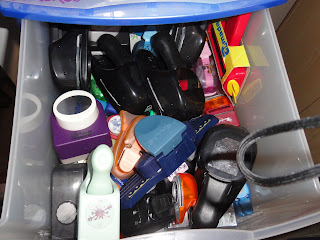
This iris cart is filled with punches (yes~~I have a lot, but I am thrifty and buy them on sale and clearance)
This is the closet. I have been able to put lots of stamps on the left side, on the right side, in those 12X12 iris boxes are my scrapbook papers and Theme boxes. There are also some assorted scrapbook supplies housed here
Here is where I set up my Cricut (hopefully I will use it more) and my Slice.
This is the wall where I have lots of my scrappy supplies and embellies:
The guys rolled ribbon onto clothespins to help me try a new way to organize my huge ribbon supply ;)
Love those Stufftainers by Stampendous!!!
Sunday, September 5, 2010
I loved how it really made the color pop on this picture! and I love the little banners!
Friday, September 3, 2010
I Confess
Next, I cut the bag into strips.
Thursday, September 2, 2010
My turn with the September kit!
My first layout is from our recent trip to South Dakota and Wyoming. The colors in this kit are perfect for this picture! I didn't use ANY patterned paper on this layout!
I had sooooo much fun playing with the Crafty Chronicles in this kit! I cut them into circles, inked them, and then crumbled them all up! It fits with old time picture of Kiley from the Wisconsin Dells! It is a very simple layout, but the picture is so busy and small, that I didnt want to distract from that.
I think you will all LOVE this kit!